Can You Repair a Broken Guitar Neck? A Complete Guide
If you’re hit hard by the heartbreaking news of your guitar’s broken neck, fret not! There is hope. Many times, it’s possible to mend a broken guitar neck and bring back its former grandeur. In this all-inclusive guide, I’ll walk you through the detailed step-by-step process of fixing a broken guitar neck. We’ll start from examining the extent of damage all the way to rejuvenating the neck with finesse. Moreover, we’ll discuss when it’s wise to consider professional assistance and sprinkle in some valuable tips throughout this repair expedition. So grab your strings and let us embark on this journey together as we revive your beloved guitar!
Assessing the Damage
Repairing a broken guitar neck is no easy task. It requires a keen eye and careful assessment of the damage. But fear not, because I’m here to guide you through the process.
The first thing you need to do is examine the nature of the crack. Is it a tiny, hairline crack or a clean break? This distinction is crucial in determining the appropriate repair method. If it’s just a hairline crack, you might get away with applying some wood glue and clamping the pieces together. But if it’s a clean break, some extra steps are necessary: removing old glue and reattaching with fresh glue.
Once you’ve assessed the crack, turn your attention to its size and location. Is it close to the headstock or further down towards the body of the guitar? The location plays a vital role in determining how much strength and stability will be required during repairs.
Lastly, but hardly least important, check for any additional damage caused by the breakage. Are there any loose bits or debris that need cleaning? It’s essential to thoroughly clean the area before jumping into any repairs.
By taking these factors into consideration – carefully assessing each one – you’ll gain valuable insight into what needs to be done in order to successfully mend your precious guitar neck.
Want more tips on guitar maintenance? Check out this helpful resource:
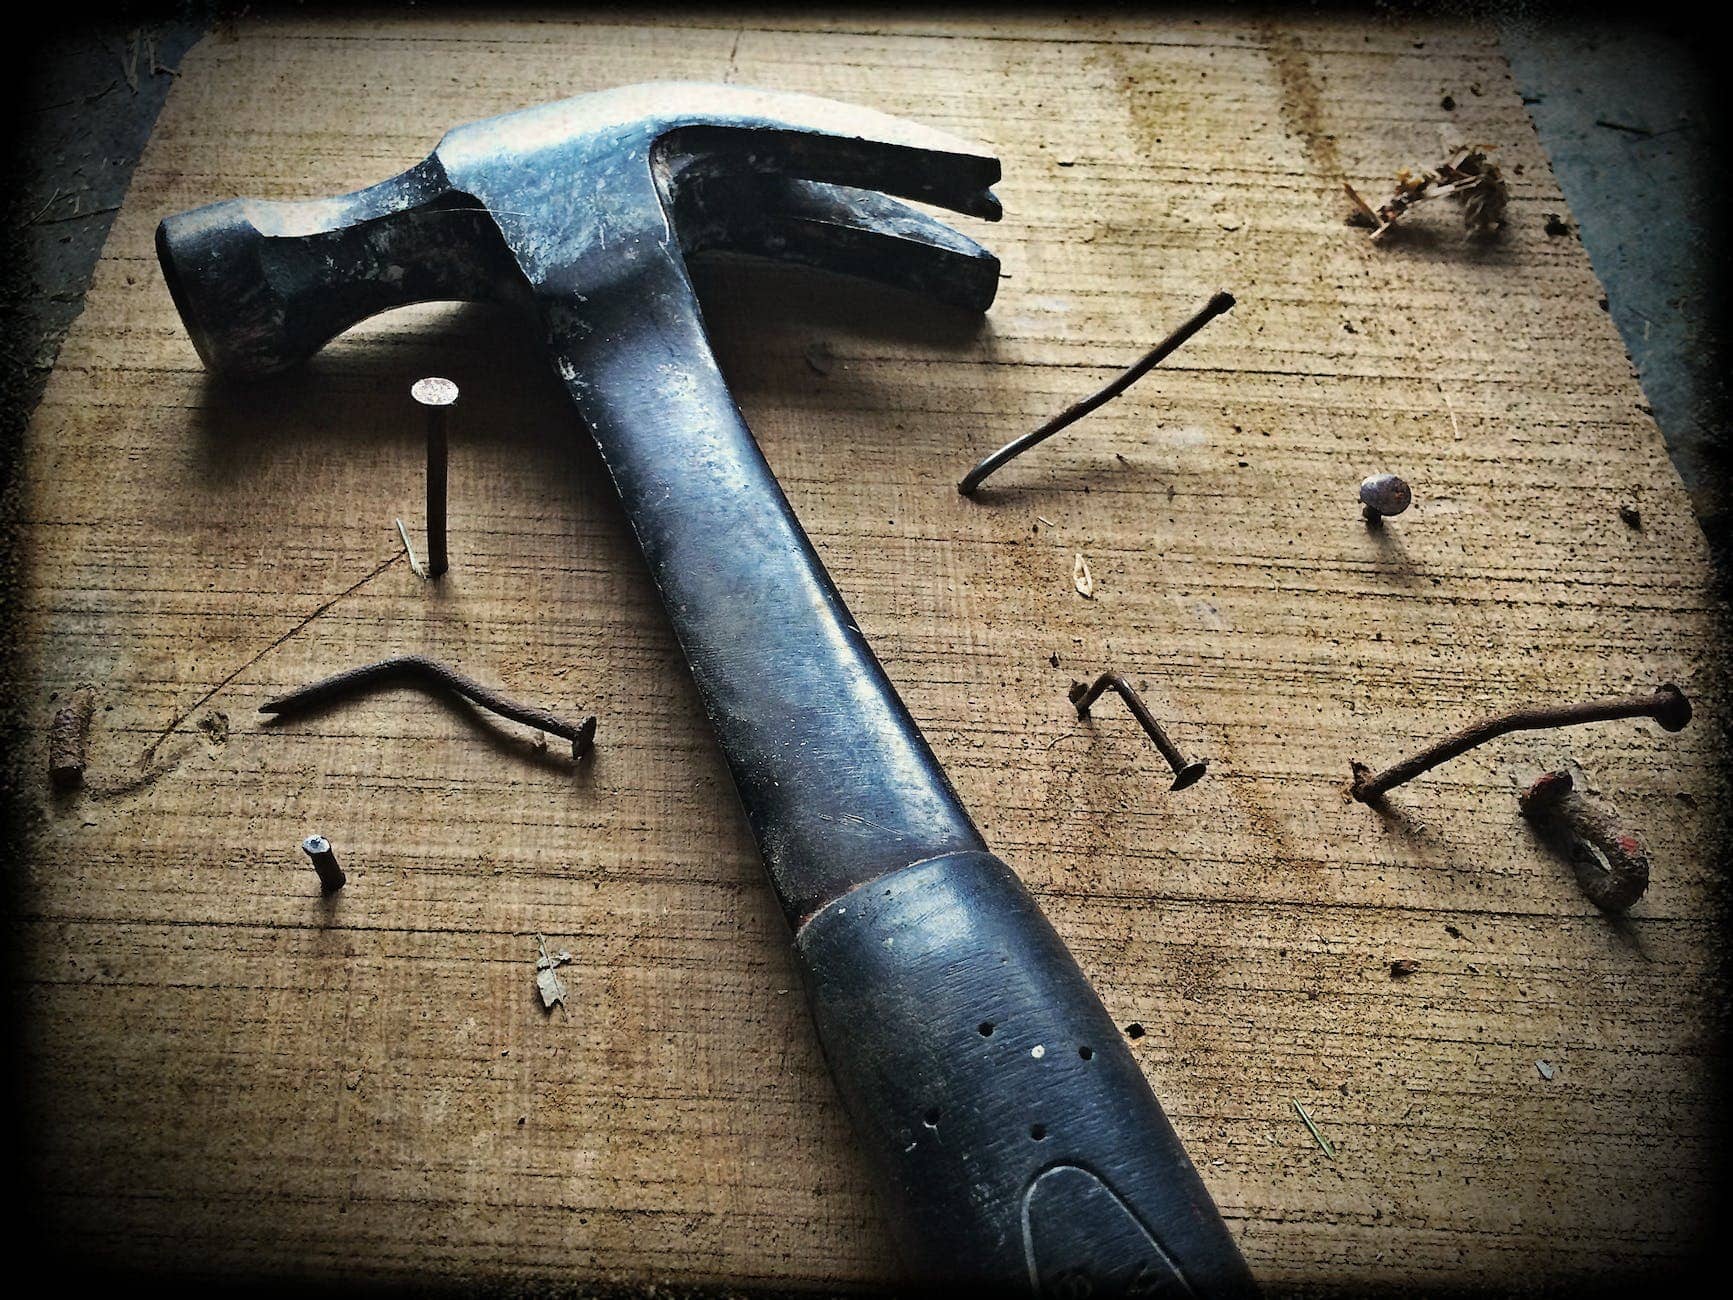
Gathering the Tools and Materials
To effectively repair a broken guitar neck, it’s important to gather the necessary tools and materials beforehand. Here are the essential items you’ll need for the task:
- Clamp: A sturdy clamp will hold the neck in place during the repair process.
- Wood glue: Choose a high-quality wood glue that dries clear and bonds strongly. This will be used to fix the broken pieces back together.
- Damp cloth: Use a damp cloth to clean any debris or excess glue from the guitar neck before starting the repair.
- Sandpaper: You may need sandpaper to smooth out rough edges after reattaching the broken parts of the neck.
- Guitar repair tool kit: Invest in a reliable guitar repair tool kit that includes items like screwdrivers, needle files, and wrenches for minor adjustments during the repair.
- Piece of wood or cardstock: Sometimes, you might need an additional piece of wood or cardstock to provide extra support while clamping or aligning parts of the neck.
Having these tools and materials ready before starting your guitar neck repair will ensure a smoother process and increase your chances of success. Plus, being prepared allows you to focus on making meticulous repairs without any interruptions.
Removing the Old Glue
When it comes to repairing a broken guitar neck, removing the old glue is a crucial step. Before beginning the repair process, you need to ensure that any previous adhesive or glue on the cracked area is completely removed. This will allow for a clean and strong bond when you apply new glue.
To remove the old glue, you will need a few tools and materials. One of the most commonly used tools is a guitar neck repair clamp, which helps hold the crack together during the repair process. Additionally, having some good quality wood glue and an eye for detail is essential for achieving a successful repair.
Before applying any pressure to remove the old glue, it’s important to note that excessive force can damage not only the finish but also other delicate parts of your guitar. Therefore, be gentle and careful throughout this procedure.
Once all remnants of old glue have been cleared away, you can proceed with realigning and clamping the neck in order to create a secure bond that will withstand tension and keep your guitar playing beautifully.
Realigning and Clamping the Neck
After removing the old glue, the next step in repairing a broken guitar neck is realigning and clamping the neck. This is crucial to ensure that the pieces fit together properly during the repair process.
Realigning the Neck: First, carefully align the two pieces of the broken neck to their correct positions. Use your hands to line up both edges of the break as close as possible. It may take some patience and trial-and-error to get it right, but taking your time will help you achieve a better result in the end.
Clamping the Neck: Once you have aligned the pieces, it’s time to clamp them together tightly. This will hold them in place while the glue sets. You will need a clamp large enough to reach around the entire neck circumference. Place protective padding on both sides of the neck before applying pressure with your clamp.
Remember that using too much pressure can damage your guitar’s finish or even further crack the wood. Conversely, insufficient pressure may lead to an unstable repair. Finding a balance is essential for success.
Smoothing Out the Rough Edges
After repositioning and clamping the guitar neck, it’s time to focus on smoothing out the rough edges caused by the repair process. This step is essential for ensuring a seamless and professional-looking result.
Using sandpaper of medium grit, begin by gently sanding down any excess glue or uneven surfaces around the repaired area. Be careful not to apply too much pressure as you don’t want to damage the wood or alter the shape of the neck.
Next, switch to a finer grit sandpaper to achieve a smoother finish. Gradually work your way up to higher grits until you’re satisfied with the smoothness of the neck.
To further refine the appearance, consider using a buffing compound or polishing cloth to give the repaired area a polished shine. This will not only enhance its visual appeal but also help blend in the repaired portion with the rest of the guitar’s neck.
Remember, taking your time during this step is crucial. It may require some patience and attention to detail, but achieving a flawless finish will greatly contribute to both the aesthetics and structural integrity of your guitar neck repair.
Refinishing the Guitar Neck
To give your repaired guitar neck a polished and professional look, you may want to consider refinishing the neck. Refinishing not only enhances the appearance of the neck but also adds an extra layer of protection.
Before you start refinishing, gather the tools and materials you’ll need for the job. This includes sandpaper with different grits (ranging from coarse to fine), wood stain or paint, clear finish or lacquer, a brush or cloth for application, and masking tape to protect any parts you don’t want to refinish.
Once you have everything ready, begin by removing the old finish from the neck using sandpaper. Start with a coarse grit to remove any existing finish and then progressively move to finer grits for a smooth surface.
Next, apply your chosen wood stain or paint, following the instructions on the product label. Ensure that you apply multiple thin coats rather than one thick coat for better results.
After allowing sufficient drying time, it’s time to apply the clear finish or lacquer. This will provide protection and give the neck a glossy appearance. Apply several thin coats, allowing each coat to dry before applying the next one.
Remember to be patient throughout this process as it may take some time for each coat to fully cure. Once completed, your refurbished guitar neck will not only be structurally solid but will also look like new again.
Knowing When to Seek Professional Help
If you have attempted to repair your broken guitar neck but are unsure of the results, it might be time to consider seeking professional help. While DIY repairs can be rewarding and cost-effective, there are certain situations where the expertise of a professional is necessary for optimal results.
One scenario where professional assistance is essential is when the break in the guitar neck is severe or extensive. In such cases, a specialist will have the tools and skills needed to properly assess the damage and determine the best course of action. They can ensure that your guitar is repaired correctly without further compromising its integrity.
Additionally, if you are unfamiliar with guitar anatomy or lack experience in intricate repairs, a professional’s expertise will come in handy. Their knowledge allows them to identify potential issues beyond what an untrained individual might notice.
Finally, seeking professional help is crucial if you value the appearance and overall quality of your instrument. Professional repair services often offer refinishing options that can restore your guitar to its former glory. This ensures that both functionality and aesthetics are taken care of.
By knowing when it’s time to seek professional help for your broken guitar neck repair, you can make an informed decision on how to proceed. Whether it’s due to extensive damage, lack of expertise, or a desire for a pristine appearance, consulting with professionals ensures that your instrument receives top-notch care and attention.
Best Glue for Guitar Neck Repair
When you’re faced with the task of repairing a broken guitar neck, it’s essential to choose the right glue. The glue you select will determine how strong and durable the repair will be. There are various options available in the market, each with their own advantages and disadvantages.
One of the recommended choices for guitar neck repair is wood glue. Wood glue possesses exceptional bonding properties and establishes a firm connection between the fractured pieces of the neck. It is also user-friendly and dries transparently, making it perfect for repairs that prioritize aesthetics.
An alternative option is cyanoacrylate glue, also known as super glue or CA glue. This particular adhesive offers a rapid drying time and forms a robust bond. However, it may present more challenges during application compared to wood glue, and its suitability for certain types of repairs might not be guaranteed.
If you’re seeking utmost strength and flexibility, then epoxy resin might be an excellent choice. Epoxy creates a powerful bond that can endure tension and stress, making it appropriate for repairs involving high string tension or intense playing styles.
Before applying any adhesive, it’s vital to thoroughly clean the surfaces and ensure that the broken pieces fit snugly together. Applying pressure through clamps or other methods will aid in establishing a secure bond.
It’s important to remember that while DIY repairs can save you money, they might not be suitable for complex or extensive damage. If you lack confidence in your repair skills or if the damage is severe, it’s always advisable to seek professional assistance from experienced guitar neck repair services.
Guitar Neck Repair when Broken at the Body
If you find yourself in a situation where your guitar neck is broken at the body, don’t panic! It’s actually a common issue that many guitarists encounter. In this section, we will discuss the process of repairing a guitar neck when it is broken specifically at the body.
Before we dive into the specifics, it’s important to assess the damage and determine if it’s something you can repair yourself or if you need to seek professional help. Assessing the extent of the damage will help you decide whether it’s worth attempting a DIY repair or if professional assistance is necessary.
Once you’ve assessed the damage, gather the necessary tools and materials for the repair. This may include clamps, wood glue, sandpaper, and other supplies depending on the severity of the break.
Next, remove any old glue from both surfaces of the break using an appropriate tool. Make sure to clean and prepare both surfaces thoroughly before moving forward with the repair.
Now comes the realignment and clamping stage. Carefully position both parts of the broken neck together and apply sufficient pressure using clamps to hold them in place while allowing room for glue application.
After applying wood glue to both surfaces, gently remove any excess glue that squeezes out during clamping.
Once you’ve clamped everything securely in place, allow sufficient time for drying as per instructions given on your wood glue package. Remember not to rush this step as proper drying time is crucial for a successful repair.
With drying complete, carefully remove the clamp and inspect your repair job. Sand down any rough edges using sandpaper until you achieve a smooth finish on your repaired guitar neck.
Finally, consider refinishing your repaired guitar neck if needed to match its original appearance. Seek professional advice or reference reliable tutorials online before proceeding with this step.
Repairing a guitar neck when it is broken at the body requires patience and attention to detail. So take your time throughout each stage of this process to ensure a successful repair. However, if you are uncomfortable or unsure about any aspect of the repair, it’s always best to consult with a professional guitar neck repair service or a reputable guitar repair shop near you.
Acoustic Guitar Neck Adjustment
Maintaining the playability of your acoustic guitar requires proper adjustment of the neck. Over time, factors like humidity and temperature can cause the neck to shift, leading to intonation issues and discomfort while playing. In this section, I will explain how to adjust the neck of an acoustic guitar to ensure exceptional performance and sound quality.
Assessing the Need for Neck Adjustment
Many people are unaware that their guitar may need some tweaking until they encounter problems like high action or fret buzz. If you’re struggling to produce clear notes on certain frets or notice a significant bow in the neck, it’s time to make some adjustments.
Tools and Materials for Acoustic Guitar Neck Adjustment
To adjust the neck of your acoustic guitar, you’ll require a few tools and materials:
- Truss rod wrench: This specialized tool allows you to modify the truss rod within the neck.
- Capo: It helps hold down strings while making adjustments.
- Screwdriver: Used for tasks like adjusting saddle height or tightening loose screws.
- Measuring tool (ruler or feeler gauge): Essential for checking string height or relief.
The Process of Adjusting an Acoustic Guitar Neck
Adjusting an acoustic guitar neck involves manipulating the truss rod to achieve optimum curvature. Here’s a step-by-step guide:
- Carefully loosen the strings to avoid any damage.
- Locate the truss rod adjustment nut at either end of the neck (usually accessible through a small hole near one end).
- Use the correct size truss rod wrench and make small quarter-turn adjustments clockwise or counterclockwise based on your specific needs.
- After each turn, check for changes in neck relief, which refers to its curvature.
- Repeat steps 3 and 4 until you achieve the desired amount of relief or straightness.
- Once adjusted, tune the strings to their standard tuning.
Remember, it’s crucial to make gradual adjustments as excessive force can harm the neck.
By mastering the skill of adjusting your acoustic guitar’s neck properly, you can optimize playability and ensure a comfortable playing experience. However, if you don’t feel comfortable performing these adjustments yourself, it’s best to seek professional help from a reputable guitar repair shop or technician.
Cost of Repairing an Acoustic Guitar Neck
Repairing an acoustic guitar neck can cost varying amounts, depending on a few factors. Many people who feel comfortable with do-it-yourself (DIY) projects may opt to handle the repair themselves, which ultimately saves some money. However, if you lack experience or don’t possess the necessary tools and materials, it might be best to entrust the task to professionals. Guitar neck repair shops usually charge somewhere between $50 and $200 for fixing a cracked or broken guitar neck. In cases where the damage proves more severe and demands extensive work like resetting the neck joint or replacing the truss rod, the cost can rise substantially. It’s crucial to evaluate the extent of the damage before making any decisions and weigh whether investing in a new guitar may actually be more worthwhile than covering repair costs.
Repairing a Guitar with a Broken Headstock
If you find yourself in the unfortunate situation of having a broken headstock on your guitar, don’t panic! While it may seem like a major repair job, with the right tools and techniques, you can fix it yourself. Before diving into the repair process, assess the damage to determine if it’s something you can handle. If you’re unsure or uncomfortable with doing the repair yourself, it’s always a good idea to seek professional help from guitar neck repair shops.
To get started with repairing a broken headstock, gather the necessary tools and materials. You’ll likely need clamps, wood glue (such as Titebond), sandpaper, a chisel or knife for removing old glue, and possibly some touch-up finish depending on the extent of damage to the guitar.
Next, remove any old glue from both the headstock and neck joint using a chisel or knife. Be careful not to damage the wood further while doing this. Once cleaned up, apply an ample amount of wood glue to both surfaces before carefully realigning the pieces back together. Use clamps to hold them firmly in place while allowing enough time for the glue to dry completely.
After the repairs are made and dried properly, smooth out any rough edges using sandpaper. If needed, you can refinish the area where repairs were made to match the rest of your guitar neck.
Knowing when to seek professional help is crucial. If you have little experience with DIY guitar neck repairs or if the break is significant or near complex areas such as truss rod or joints, it’s best to let professionals handle it.
Remember that fixing a broken headstock requires patience and precision. If done correctly though, you can bring your beloved instrument back to life without breaking your bank account!
Conclusion
In conclusion, repairing a broken guitar neck is indeed possible with the right tools, materials, and techniques. While it may seem like a daunting task at first, with patience and practice, you can successfully fix your guitar’s neck and restore it to its former glory. Remember to assess the damage accurately before starting your repair journey. Gather all the necessary tools and materials needed for the job. Take your time when removing old glue, realigning and clamping the neck, and smoothing out rough edges. A good idea is to seek professional help if you’re unsure about handling major repairs or if you don’t have the experience. Additionally, always consider the cost of repairing an acoustic guitar neck when deciding whether to DIY or seek professional assistance. In any case, don’t panic - most guitar neck cracks can be repaired effectively with care and attention!
FAQ
Can a broken guitar neck be repaired?
Yes, a broken guitar neck can be repaired. However, the success of the repair depends on the extent of the damage and the skill of the person performing the repair.
How do you assess the damage on a broken guitar neck?
To assess the damage on a broken guitar neck, you need to carefully inspect the neck for cracks, breaks, or misalignments. You may also need to try to play the guitar and see if there are any noticeable issues with the playability.
What tools and materials do you need for repairing a broken guitar neck?
The tools and materials you need for repairing a broken guitar neck may include clamps, glue, sandpaper, a file, a chisel, a heat gun, and a finish for refinishing the neck.
How do you remove the old glue from a broken guitar neck?
To remove the old glue from a broken guitar neck, you can use a combination of heat and a chisel or a scraper to carefully scrape off the glue residue.
How do you realign and clamp a broken guitar neck?
To realign and clamp a broken guitar neck, you need to make sure that the pieces of the neck are properly aligned, apply glue to the joint, and then use clamps to hold them together until the glue dries.
How do you smooth out the rough edges after repairing a broken guitar neck?
To smooth out the rough edges after repairing a broken guitar neck, you can use sandpaper or a file to carefully reshape and smooth the area.
What is the best glue for guitar neck repair?
There are several types of glue that can be used for guitar neck repair, including hide glue, epoxy, and cyanoacrylate glue (super glue). The best type of glue may depend on the specific repair and personal preference.
When should you seek professional help for repairing a broken guitar neck?
You should seek professional help for repairing a broken guitar neck if you are unsure about your own abilities, if the damage is severe, or if you want to ensure a high-quality repair.
How do you adjust the neck of an acoustic guitar?
To adjust the neck of an acoustic guitar, you can use the truss rod to change the neck’s curvature and adjust the action of the strings.
How much does it cost to repair an acoustic guitar neck?
The cost of repairing an acoustic guitar neck can vary depending on the extent of the damage and the location of the repair shop. On average, it can cost anywhere from $50 to $300 or more.
Can a guitar with a broken headstock be repaired?
Yes, a guitar with a broken headstock can be repaired. It is a more complex repair that often requires professional assistance.